
Creating a small business website in 2025 doesn’t have to be overwhelming. With the right planning, tools, and guidance, you can build a site that attracts customers, boosts credibility, and drives sales. This step-by-step guide will walk you through the entire process, from goal setting to SEO optimization.
Before you pick a template or start adding content, the first step is to define the goals of your website. This is the foundation for everything else. Without clear goals, even a visually stunning website can fail to attract visitors, generate leads, or drive sales.
Ask yourself: Why am I building this website? Your goals could be:
Pro Tip: Write down your main goal. This will guide your design, content structure, and platform choice. For instance, if your main goal is lead generation, you’ll focus on clear CTAs, forms, and information that encourages visitors to take action.
Example: Imagine you run a local bakery creating a website:
Services section: Highlight your offerings, like consulting, handmade goods, or local services
Testimonials: Share quotes from happy customers
Blog or tips section: Write helpful guides related to your business, such as “How to choose the right service” or “Top tips for local shopping,” naturally including keywords like small business website development when discussing online presence or website tips
Your website goals guide critical design choices:
Structure: Lead-focused? Put forms or sign-up buttons above the fold.
Content: Want more traffic? Include blogs or guides with SEO in mind.
CTA Placement: Guide visitors to take action, whether it’s subscribing, purchasing, or learning more.
Once your goals are clear, the next step is to plan your website’s structure and content. Think of this as building the blueprint before laying bricks, it saves time, prevents confusion, and ensures your website supports your goals.
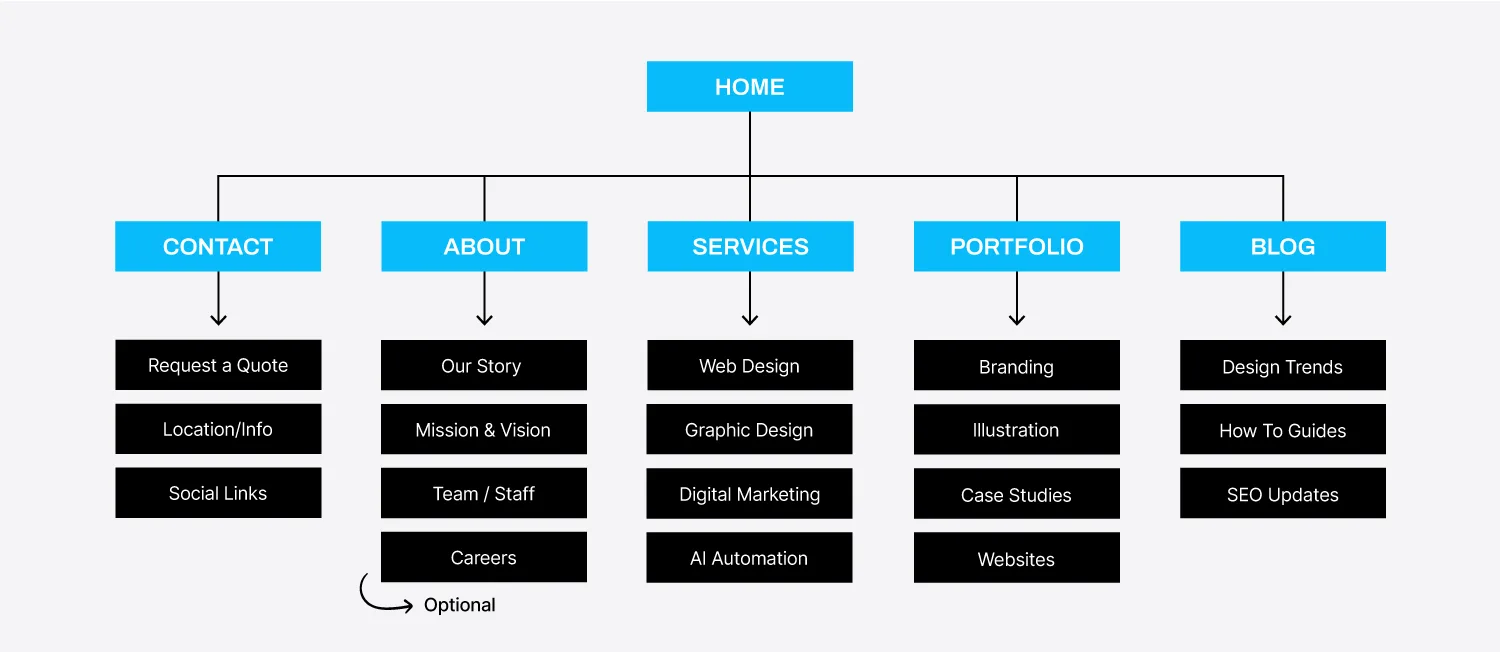
A sitemap is like a roadmap for your website. It outlines every page, section, and content block. This is especially important for small business website development, because a clear structure helps both visitors and search engines navigate your site.
Practical Tip: Use tools like Slickplan, Miro, or even a simple spreadsheet. Include main pages like:
Homepage
About
Services
Blog
Contact
Optional pages might include: FAQ, Portfolio, or Testimonials. For example, if your goal is lead generation, place forms on multiple pages to capture visitor information efficiently.
A smooth user flow keeps visitors engaged. Map out how users move from the homepage to other pages. Make menus intuitive and avoid overwhelming choices.
Pro Tip: Map a common user journey. For example, a visitor might start at the homepage, browse a product category, view a product, add it to the cart, read a blog for more information, and finally complete a purchase. Planning this flow helps your small business website development be user-friendly and optimized for conversions.
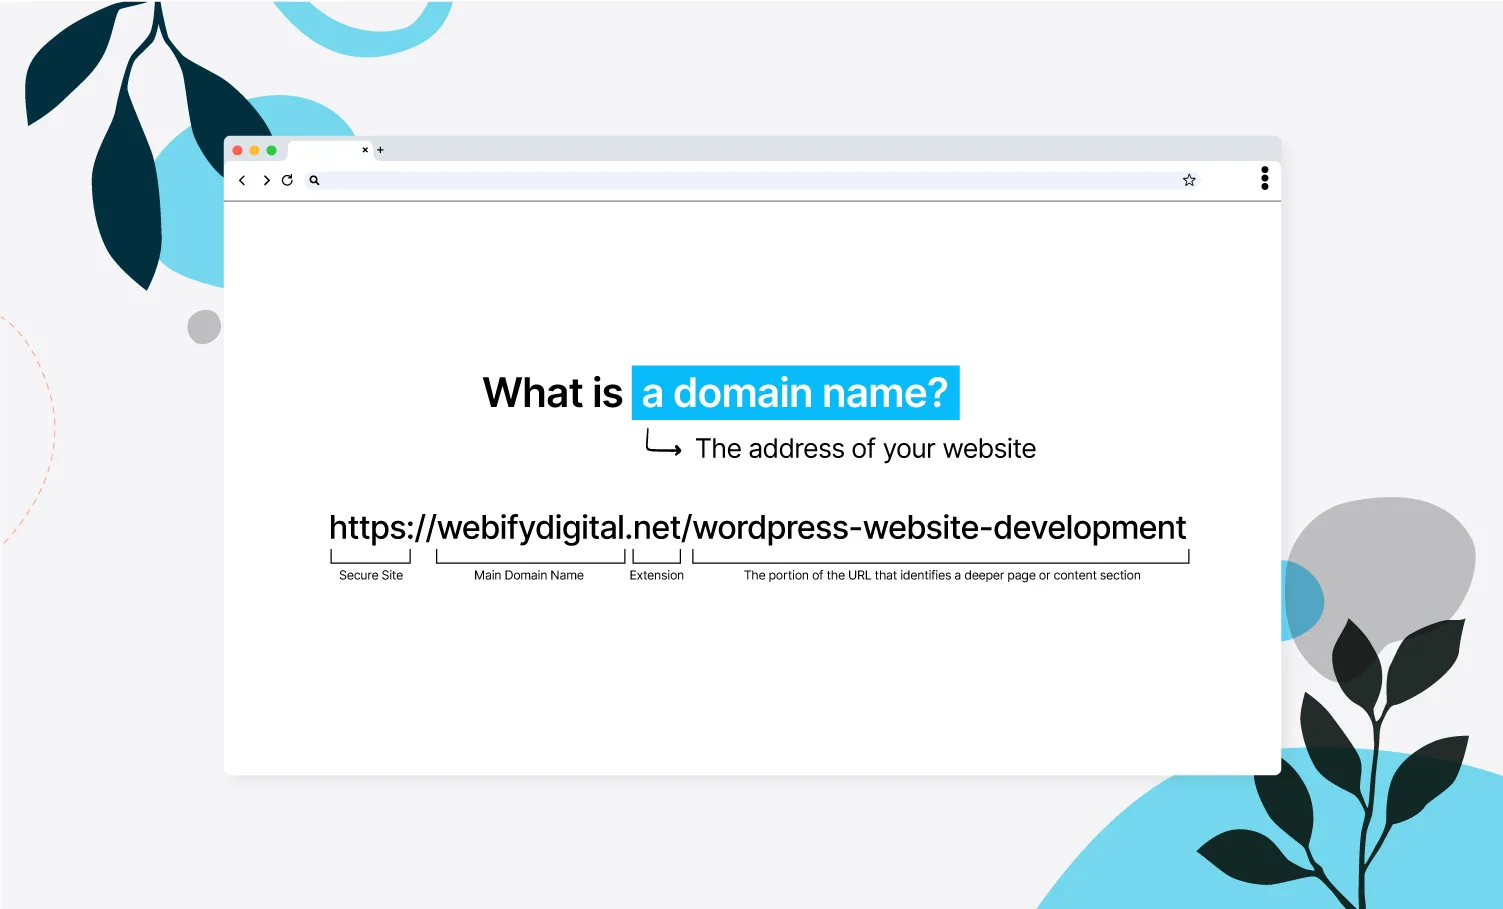
Your domain name is your online address, the first impression of your brand on the internet. It should be easy to remember, easy to spell, and directly connected to your business identity. In small business website development, this step is often overlooked, but it can make or break your brand recognition.
Here are some quick tips:
Keep it short and simple. Aim for 2–3 words max. For example, “brightbakery.com” or “urbanthreads.shop.”
Avoid numbers or hyphens. They’re hard to remember and often mistyped.
Use keywords wisely. If you offer web design or online products, include terms like “design,” “studio,” “store,” or “digital.” Example: “freshlookdesigns.com.”
Make it brandable. Even if your site focuses on affordable website design, try blending creativity and clarity. “NovaSites” or “CraftlyWeb” sound professional and unique.
Pro Tip: Before finalizing, check if the same name is available on social media platforms. Having consistent handles across platforms strengthens your brand identity.
Your domain extension is the part that comes after your name (.com, .net, .org, etc.). While .com is the most popular and trusted, other options can help target specific audiences:
.co — Great for startups and tech brands.
.store — Ideal for e-commerce and product-based sites.
.pk or .uk — Perfect for targeting local customers.
.shop or .online — Great for small businesses selling products or digital goods.
If your website is focused on a specific region, using a local domain can boost SEO locally. For instance, a small business website development company in the UK might prefer “creativesites.co.uk” to attract regional clients.
Once you’ve chosen your perfect name, you’ll need to register it. For WordPress users, this usually means buying your domain through a registrar or hosting provider.
Popular options include:
Namecheap – Affordable, reliable, and easy to manage.
GoDaddy – Offers domains, hosting, and email under one account.
Google Domains – Simple and user-friendly interface.
Hostinger – Great if you plan to host your small business website development project there too.
Pro Tip: Always register the domain under your own account. Avoid letting agencies or freelancers own it. This ensures you maintain full control of your brand online.
When you register, grab your domain for multiple years if possible. This not only saves you money long-term but also gives search engines a signal of stability, which slightly helps with SEO.
Once your domain is ready, the next step in small business website development is picking the right hosting. Hosting is where your website “lives” online, and choosing the right provider affects speed, uptime, and performance.
WordPress is one of the most popular platforms for small business website development due to flexibility and ease of use. Some top hosting providers include:
Platforms like Wix, Webflow, and Shopify include hosting in their plans, so you don’t need a separate provider. This makes setup easier, especially if your goal is to launch quickly.
If you’re building an online store, Shopify handles everything from hosting to security and checkout. You can focus on products, branding, and marketing. When offering small business website development, Shopify makes it easier to provide affordable website design packages that include e-commerce functionality.
Example: A client wants a store with 50 products. You can offer a small business website package on Shopify, handling design, product setup, and SEO, all while using Shopify’s built-in hosting.
Design is where your website’s personality and purpose come together. In small business website development, great design isn’t just about visuals, it’s about how easily visitors can understand, navigate, and trust your site. This step combines everything: layout planning, templates, branding, colors, fonts, and user experience.
Before you touch any builder, open Figma. This is your creative planning board. You’ll sketch the structure and flow of your website before actually building it.
Pro Tip: Keep the layout clean and balanced. In Figma, use auto layout and frame alignment to visualize spacing and hierarchy. Include areas for headlines, buttons, and visuals.
Once you’re satisfied with your wireframe, it’s time to bring it to life with a template or theme. Every platform has its own style and flexibility:
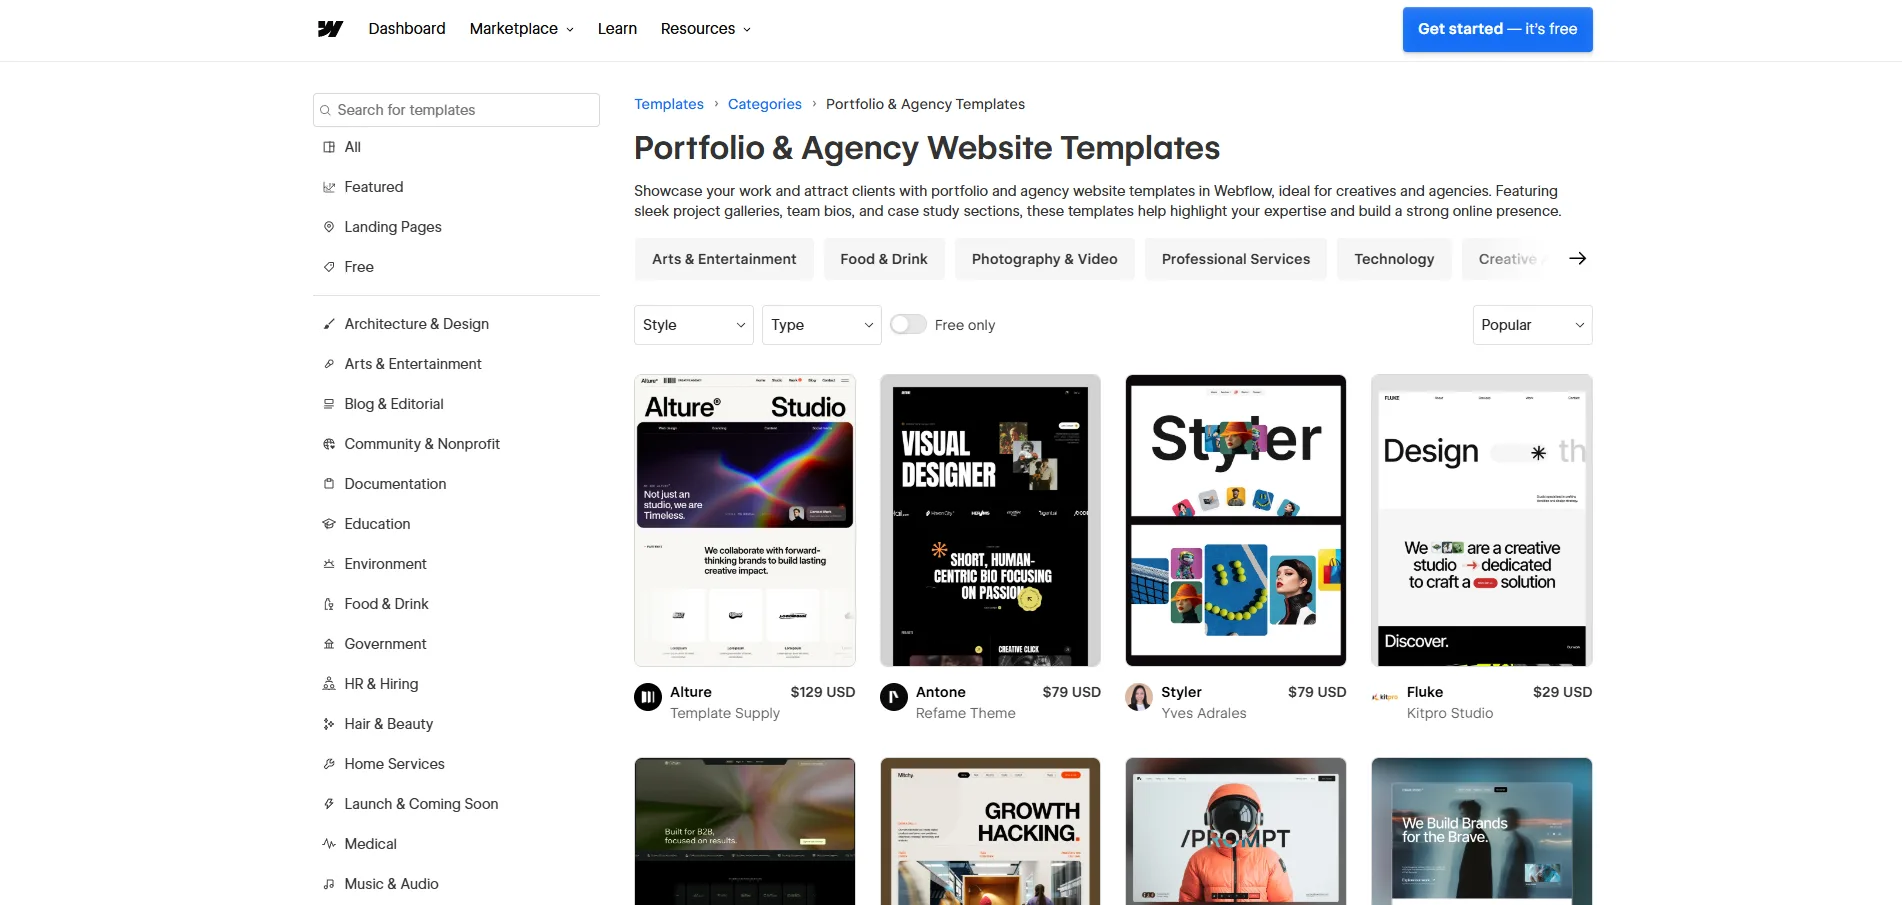
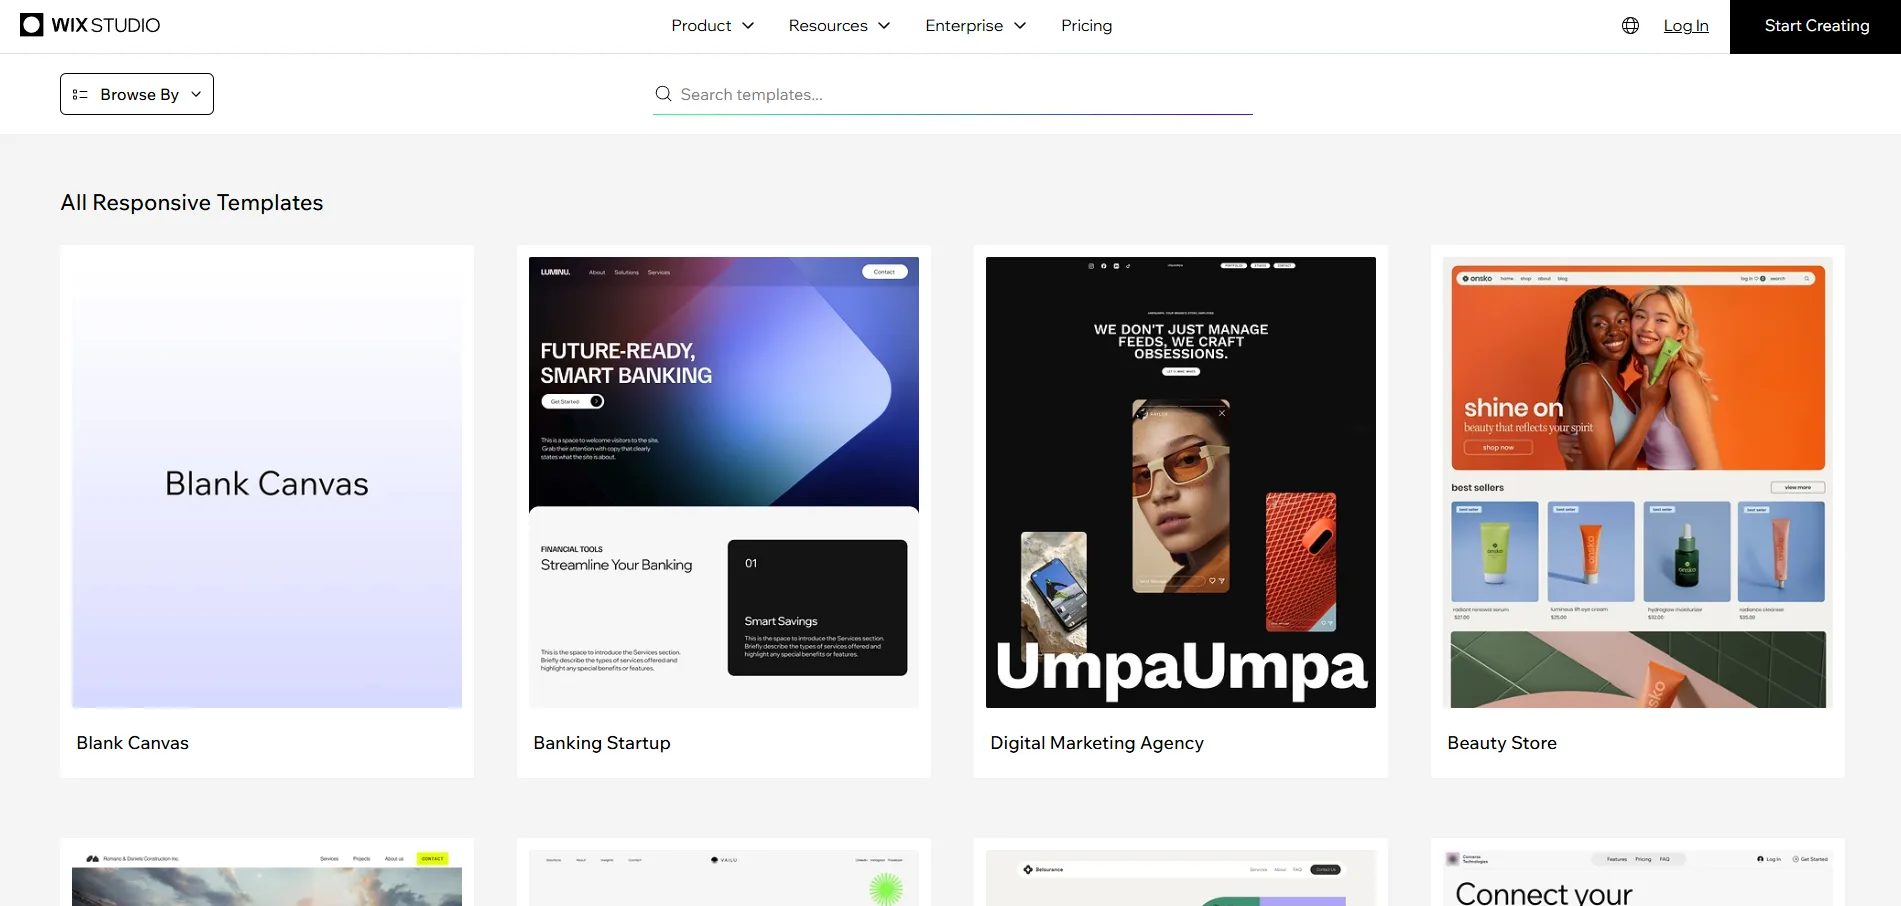

Pro Tip: Always choose templates that match your goals. If you’re selling online, pick something optimized for e-commerce (with space for product grids and CTAs). For service-based websites, choose clean, section-based templates that highlight offers and contact options.
Colors and fonts define your brand personality. They influence how visitors feel about your business before reading a single word.
Tips for choosing colors:
Stick to 2–3 primary colors and 1 accent color.
Ensure high contrast between background and text.
Use neutral backgrounds and bright CTAs (like blue buttons on white).
Example color palettes:
Blue and green (trust and growth) – great for service sites.
Orange and white (energy and creativity) – great for startups.
Black and gold (luxury and sophistication) – ideal for premium brands.
Font pairing examples:
Poppins (headings) + Open Sans (body) – modern and easy to read.
Montserrat + Lato – professional and minimal.
Your logo, favicon, and other visuals build brand identity. They help visitors instantly recognize your business anywhere online.
Action steps:
Design your logo in Figma or Canva using your color palette.
Export it in PNG (transparent) and SVG formats.
Create a favicon (small browser icon) that matches your logo symbol.
Maintain consistent logo placement—top left corner is standard.
Pro Tip: If you don’t got a logo yet, create a text-based logo first. A clean design looks more professional than a cluttered one.
A beautiful design is useless if users can’t find what they need. That’s where user experience (UX) comes in.
UX Best Practices:
Keep navigation menus short (4–6 main links).
Place CTAs like “Get a Quote” or “Add to Cart” above the fold.
Add whitespace to separate sections and avoid visual clutter.
Optimize your images for faster loading (under 200KB when possible).
Test readability — text should be clear on both desktop and mobile.
Example: In an e-commerce Shopify store, feature top-selling products on the homepage and use sticky navigation for quick access to the cart or checkout. In a service-based WordPress or Webflow site, include clear CTAs on every page to guide visitors.
Design is storytelling. Each section of your website should lead visitors naturally from curiosity to trust to action. When combining Figma wireframes, Elementor layouts, Webflow designs, and Shopify templates, maintain a consistent look across the website.
A beautiful design is only half the work. To make your website visible to search engines and drive organic traffic, you need to optimize it for SEO (Search Engine Optimization). This step helps your site rank higher, attract visitors, and turn them into customers.
Keyword research is the foundation of every SEO strategy. It helps you understand what people are searching for and how to align your content with their intent. You’ll be showing this process step by step using screenshots from SEMrush, so here’s how to structure it clearly:
Go to SEMrush → Keyword Overview
Enter multiple seed keywords like leather jacket, handmade leather bag, leather wallet for men, custom leather belt.
Use the Keyword Magic Tool
Expand your keyword list with related suggestions. Apply filters for volume and keyword difficulty (KD) to find realistic targets.
Example filters: KD under 50, volume over 500.

Go to SEMrush → Domain Overview
Enter a competitor’s URL (for example, a popular leather store or Etsy shop).
Choose Target Region and Exact URL
Focus on the exact product or collection page.
Apply Filters (Volume + KD)
Find keywords that competitor pages rank for but you don’t.
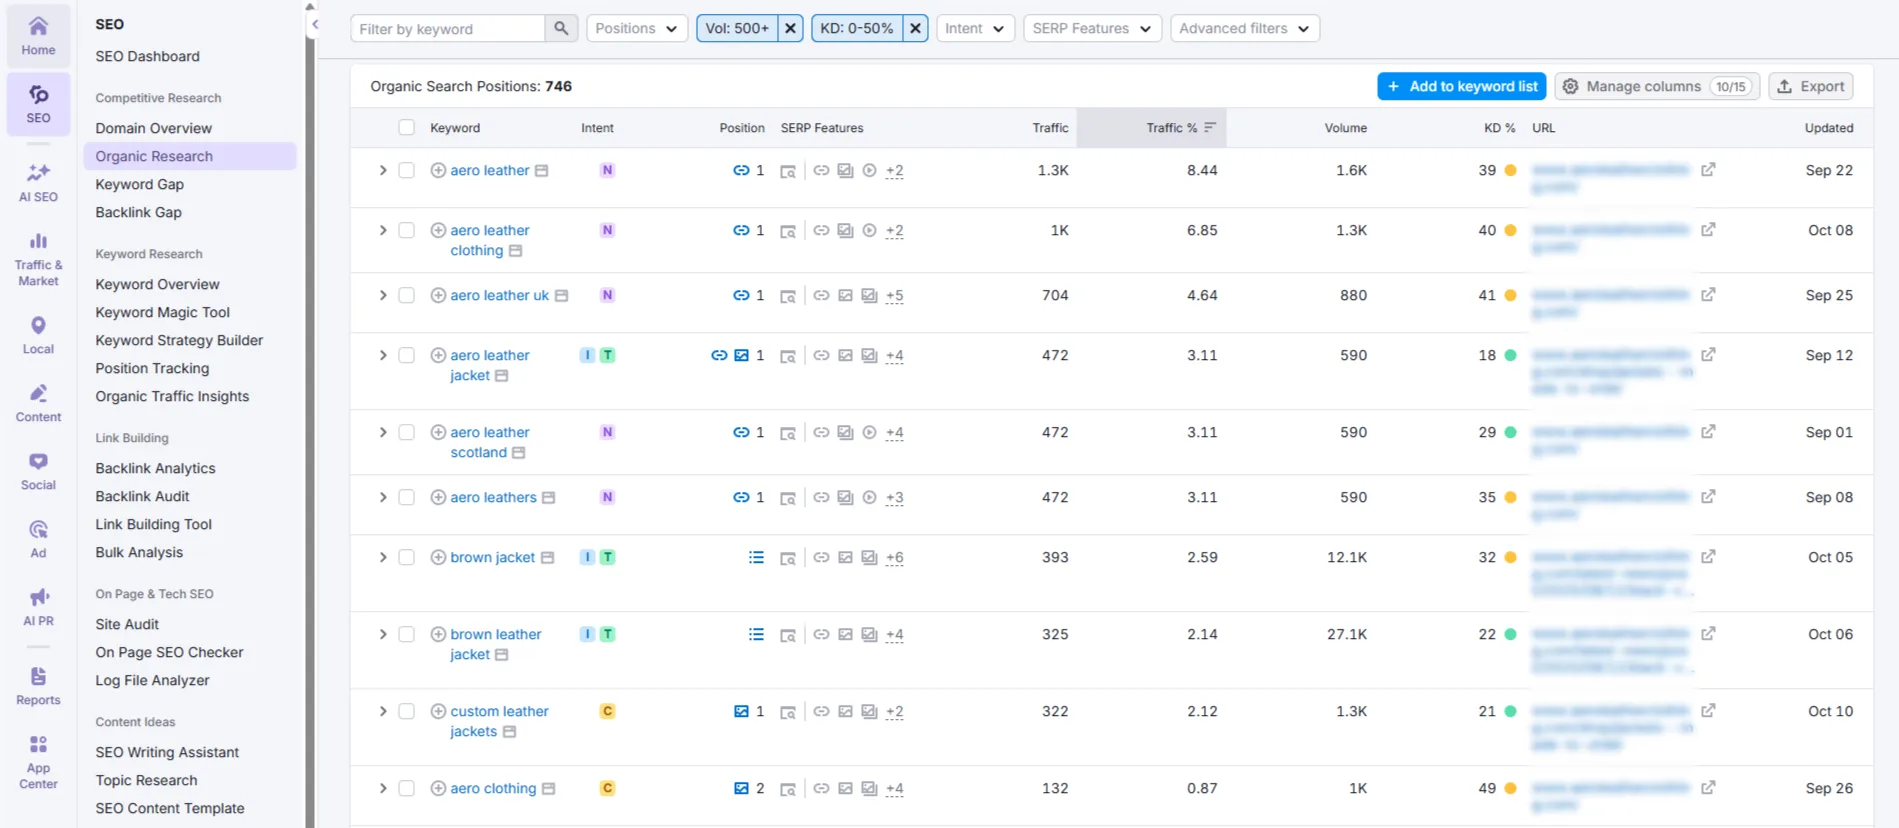
Pro Tip: Keep a spreadsheet of all keywords. Group them under categories like Products (jackets, belts, wallets), Informational (how to clean leather), and Transactional (buy leather jacket online).
Your meta title and description are what users see on Google. They affect whether someone clicks on your result.

A meta title is the main headline that appears in Google search results (The one in the red box). It tells both users and search engines what your page is about. Think of it as the first impression of your content.
A good meta title should be short (under 60 characters), clear, and focused on your primary keyword. It helps users instantly understand your page topic while also improving visibility in search results.
A commonly used format for writing a meta title is:
Primary Keyphrase + Target Region + Unique Selling Point (USP) | Brand Name

A meta description is the short summary that appears right below the title in Google search results. It gives people a quick idea of what to expect if they click on your link.
This short paragraph (usually under 160 characters) should describe your page in a friendly, natural tone and include a few related keywords. Its main purpose is to make users want to visit your page.
A commonly used format for writing a meta description is:
Add keywords Already Used in Title + Target Region + Brand Name → 1rst Sentence
Add Some Other Keywords + USPs → 2nd Sentence → No more than 2 sentences.
After keyword setup, you need to structure your pages properly.
Focus on:
Headings (H1, H2, H3): Use the main keyword in at least one H1 (e.g., “Genuine Leather Jackets”) and supporting ones in H2s.
Images: Add descriptive alt text like hand-stitched leather bag close-up.
Internal Linking: Connect related pages, such as from your “Leather Belts” page to “Leather Wallets.”
URLs: Keep URLs short, clean, and keyword-based (example: yourstore.com/leather-jackets).
Mobile Optimization: Test your product pages on mobile, since many shoppers browse on phones.
Blogs help target additional keywords and answer user questions. In the leather niche, you can write about maintenance, style, and quality.
Blog Ideas:
“How to Clean a Leather Jacket Without Damaging It”
“Top 5 Handmade Leather Gifts for Men”
“Why Genuine Leather Ages Beautifully”
Each post can include product links, improving both SEO and sales.
Tracking performance is one of the most important parts of SEO. Once your leather website is live, you need to know how visitors are finding and using it. This is where Google Analytics and Google Search Console come in.
Google Analytics is like your website’s detective. It shows how many people visit your site, where they come from (for example, Google, Facebook, or Instagram), and what actions they take (such as viewing a product, adding to cart, or leaving quickly).
By checking this data, you can figure out what’s working and what needs improvement. For instance, if you notice most visitors come from mobile, you’ll know to focus more on mobile optimization. Without Analytics, you’d be guessing who your visitors are and what they want.
Google Search Console focuses on your site’s relationship with Google Search. It helps you see which keywords your pages rank for, how often people click your results, and if your site has any technical issues (like broken links or indexing errors). It’s also where Google alerts you about security or structured data problems.
To keep your site performing well, check your Google Search Console once a week. This regular habit helps you stay on top of indexing, fix problems quickly, and make sure your products and pages stay visible in search results.
Screenshot Checklist
SEMrush Keyword Overview (multiple keywords)
SEMrush Keyword Magic Tool filtered view
Meta title and description edit in CMS
Example of internal linking in content
Connecting Google Search Console and Analytics
After designing and optimizing your site, it’s time for the final and crucial step: testing and launching your website. Proper testing ensures your site works flawlessly for visitors, supports SEO, and aligns with your small business website development goals.
Go through every interactive element:
Click every link to ensure it works.
Test forms for lead capture, subscription, or inquiries.
Check buttons, CTAs, and pop-ups for proper behavior.
Pro Tip: For a small business website development, test contact forms tied to email and CRM systems. Make sure small business website packages and pricing CTAs are functioning correctly.
Visitors access your website from desktops, tablets, and smartphones. Make sure your website is fully responsive:
Check layout on multiple screen sizes.
Ensure menus, images, and CTAs adjust properly.
Test load times on mobile devices to avoid losing visitors.
Example: A Shopify client using your affordable website design service should be able to browse products, add items to the cart, and checkout seamlessly on mobile.
Page speed is crucial for both SEO and user experience. Use tools like:
Pro Tip: Compress images, enable caching, and minimize unnecessary scripts. Even if your site looks perfect, slow performance can hurt traffic, conversions, and rankings for small business website development content.
Before fully launching, consider a soft launch:
Share the website with a small group of users or team members.
Collect feedback on design, navigation, and clarity.
Fix any issues before the official public launch.
Example: Your beta users might spot confusing navigation, broken links, or content gaps in small business website development descriptions or pricing sections.
Congratulations! You’ve made it through the full small business website development process—from defining goals to testing and launching your website. Let’s recap the steps and see why following this guide sets you up for success.
Define Your Website Goals: Knowing your core objective guides design, content, and CTAs.
Plan Site Architecture & Content: Create a sitemap, plan essential pages, and map user flow.
Choose a Domain Name: Pick a memorable, brand-friendly domain that supports SEO and credibility.
Choose Hosting: Select reliable hosting for WordPress or take advantage of built-in hosting for Wix, Webflow, and Shopify.
Design Your Website: Use Figma wireframes, templates, colors, fonts, logos, and strong UX to engage visitors.
Optimize for SEO: Implement on-page and off-page SEO strategies, track performance, and improve keyword targeting.
Test & Launch: Check functionality, device compatibility, performance, and get feedback before going live.
Following these steps ensures your small business website development project is structured, professional, and optimized for results.
If you want a stress-free, high-quality, and affordable website design, WebifyDigital is here to help. Our team specializes in small business website development, offering:
Tailored small business website packages to fit your budget and goals
SEO-friendly design that attracts traffic and converts visitors
Smooth, fast websites with excellent user experience
Hands-on support to guide you every step of the way
Ready to launch your small business website? Contact WebifyDigital today and get a professionally designed website that grows your business without the headaches.
Pro Tip: Even if you’ve followed this guide, having an expert handle the technical details and SEO can save time, boost performance, and ensure your website truly delivers on its goals.
If you found this guide helpful and want to dive deeper into creating a professional yet budget-friendly website, check out our Affordable Small Business Website Design Guide. It walks you through practical tips, real examples, and proven strategies to design a high-quality website without breaking the bank.
Grow your business with a stunning site that shows off what you do best.
From Pakistan to the world, Webify makes it easy to boost your online presence in Pakistan and beyond.
Let’s build something great together.
Your trusted web development agency for affordable, custom website design, expert SEO serving clients worldwide.